
How To Smoke Meat Using An Electric Smoker – 2021 Buyers Guide
An electric smoker is perfect for beginning smokers or BBQ enthusiasts who do not like the maintenance that wood or charcoal smokers require. Learn how to use an electric smoker to smoke meat in this post.
Electric smokers are the perfect “set-and-forget” tool you do not have to watch your food for hours, monitoring temperatures, smoke levels, or the doneness of your smoked foods.
All that is needed is to set the time and temperature controls and leave the electric smoker to work its magic.

How to Use an Electric Smoker
Many people have questions as to how to use an electric water smoker or how to use an electric bullet smoker. No matter what type of electric smoker you own, you can easily figure out how to use it.
Even if you are a beginning BBQer, you can quickly learn to use an electric smoker.
Learning How Your Electric Smoker Works
There are five main elements in any electrical smoker. These being:
- Smoker body
- Digital Controller Pad
- Water Bowl
- Wood Chip Bowl W/Lid
- Drip Tray
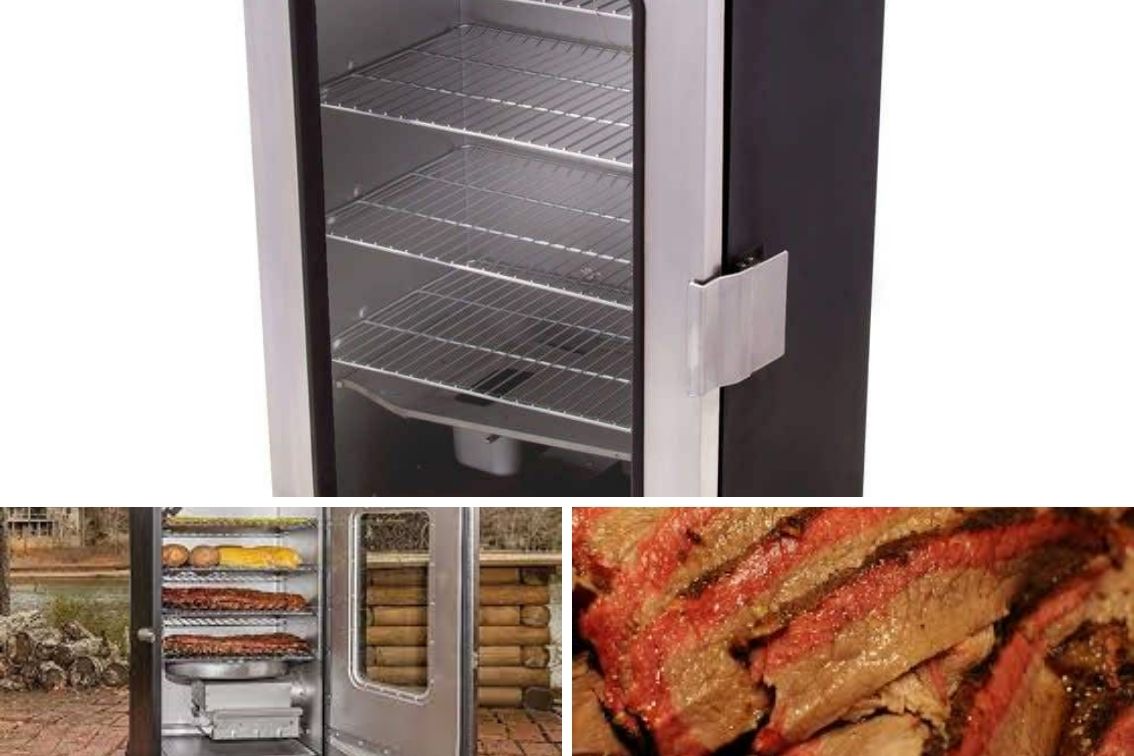
Everything You Need To Know About Your Smoker Body
The smoker body of your electric smoker is the heart of the operation. The body should be well-insulated to trap all of the heat and smoke inside until the door is opened when finished.
When shopping for an electric smoker pay particular attention to the body of the unit. Make sure that you can access the wood chip bowl without having to open the main door.
Also be sure that the label guarantees a fully insulated, and heat ready unit.
The Digital Controller Pad
The digital panel allows you to set the temperature, manage timers, manage cooking times, and any other features your specific smoker might have
If you recently purchased an electric smoker, it’s likely that you got either a Masterbuilt or Char-broil electric smoker. These are the two most popular brands.
I suggest reading the operator instructions as this will give you a detailed guide to help you understand what you need to know when it comes to operating the digital controller pad.
The Water Bowl
The smoking process will quickly take the moisture out of the air inside the smoker which will leave you with a dry, tough piece of meat. The water bowl is important to keep your meat juicy and tender.
It is important that the bowl is large enough to hold at least one or two cups of water. The longer the cooking time the more water that is needed.
Wood Chip Bowl with Lid
The main reason to get an electric smoker is a smoky flavor it can add to food.
The most important thing to keep in mind about the chip bowl is throughout the smoking session you will continuously be adding in a cup or two of wood chips to keep a nice steady stream of smoke smoldering.
It is important to be able to get to the chip bowl without having to open up the main chamber of the smoker.
Drip Tray
The objective of this drip tray is to collect all of the juices that come from the meat, keeping the temperature from fluctuating and accumulating on the bottom.
During the cooking, the drip tray will need to be emptied as it fills.
9 Easy Steps To Electric Smoker Cooking
Step 1: Deciding the Type of Smoker You Need
Electric smokers all work the same the only real questions are quality, size, shape, and price.
A vertical electric smoker is inexpensive and works great in warm weather. They have trouble maintaining the temperature in colder temperatures due to the amount of exterior surface area.
The electric cabinet smoker looks like a small refrigerator. These come with a temperature gauge that makes it easy to keep track of time and temperature. Controlling the temperature is important when smoking meat and leaving it unattended for hours of smoking at times.
We recommend a few, the Masterbuilt 30 Inch and the Smokin It Model #1 are a couple of our favorites.
Step 2: Season the Smoker
Before you cook in your smoker you need a good dry run so you can season your unit.
When I got my electric smoker, all I wanted to do was get some meat smoking. I had done some research prior to buying and everything said to cure and season your smoker.
Like other cooking appliances, the smoker must first be “cured” or “seasoned” for the best results and to give you the maximum flavor. This process removes odors, residues, toxins, and dust accumulated during the manufacturing process.
Here is a step-by-step guide to seasoning your electric smoker:
Rub all the interior surfaces of your electric smoker, including the cooking racks, with cooking oil or non-stick spray. As much as possible, use a “neutral oil” like canola or peanut oil as opposed to the more expensive olive oil.
Make sure your wood chip box and water pan are in place, be sure that there is no water in the pan.
Ensure your electric smoker is plugged in, and press the power button to turn it on.
Raise the temperature to a minimum of 275 degrees F.
Set the timer for 3-hours.
During the last hour of the process, add 1-2 cups of wood chips.
When the timer goes off, turn off the electric smoker to let it cool down.
It is It’s always important to follow manufacturer instructions during the seasoning process, and you should only have to season your appliance once.
Step 3: Flavoring and Moisturizing Your Food
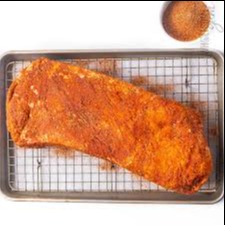
An easy cut of meat to start with is a Pork Butt or a turkey. To smoke a turkey on an electric smoker will require a large smoker that can reach a high temperature, but this is a simple and impressive first meal.
Whatever you do, you’ll need to prepare the meat by trimming any fat or brining it to ensure maximum moisture is contained.
Brine Pork or Poultry Before Smoking
Using a brine solution to soak meats such as turkey, chicken, and pork gives these meats extra flavor.
Mix salt and sugar in cold water, and add seasonings like celery salt, whole white or black peppercorns, fresh parsley, bay leaves, carrots, clove-studded whole onions, and citrus-fruit slices, and then soak overnight or preferably for 24 hours.
Then continue seasoning the meat and applying a BBQ rub.
Finally, determine out how long and at what temp you need to smoke it.
Step 4: Letting the Meat Season Overnight
Once you have seasoned it with the desired herbs or flavors, let it stay overnight. This will help the meat absorb the flavor and give you a delicious collection of tastes.
Step 5: Line Cooking Racks With Foil For Easy Post-smoking Clean Up
Some cooks advise lining your cooking racks with aluminum foil before smoking. This will reduce the amount of clean up needed after you have smoked your food. Your smoker is like an oven, the heat is surrounding the food, so the same maintenance tips apply.
A clean grill free of residual oil and grease also creates better tasting food. Make it easy on yourself.
Step 6: Add That Smoke Flavoring
In the past, there were complaints of electric smokers not being able to give a smoky flavor, unlike a charcoal grill. Newer models now have a feature to add more smoky flavors.
Find the wood chip loader on your smoker, use the manufacturer’s guide, load wood chips into it with the flavor of your choice, close the loader and you are ready to add flavor.
You can find a variety of wood chips and flavors at your local grocery store, hardware shop or you can get them online.
Not sure what flavor to get?
It depends on the meat you are smoking, I prefer cedar or hickory chips. But Adler or Cherry chips will work just fine.
The average smoker will go through roughly 4 cups of wood chips every 3-5 hours. It is important to make sure you have enough before you start cooking.
Before starting your electric smoker, check to make sure there are no obstacles to the ventilation or leaks in the door. A worn seal on your smoker door will leak valuable smoke, and poor ventilation will prevent the proper combustion for generating smoke.
It may be convenient to just use any wood that you have lying around. Unfortunately, this is very unhealthy. Stick with wood chips that you purchase at the store.
The wood chips you use have to be food quality and they will say that on the label. They can not be the same used to heat your home.
Most electric smokers come with a wood chip tray specifically for your wooden chips. But if you already own an electric smoker without a wood chip tray, here is how you can cook using wood chips.
Using a tin can for smoking wood chips in an electrical smoker:
One method for smoking wood chips in an electric smoker is to use a tin can. Drill some holes in the can, put chips inside, and place them towards the bottom of the smoker. Let them smolder.
Another method is to buy a pellet tube or you can use a box smoker.
DO NOT SOAK THE WOOD CHIPS. Wet chips simply delay them from smoking and the quality of smoke may be jeopardized.
Do not over smoke your food
It is surprising how little smoke is needed to create a top-notch flavor.
While there will be a period of experimentation which is part of the fun. Over smoking especially in the case of poultry can make it pretty much inedible.
You will likely only need to use one tray of chips/pellets when cooking chicken to get a decent flavor.
Use the technique of less is more. You need to understand that less smoke is enough to bring taste and flavor into your food.
Step 7: Adding Water And Turning On the Smoker
A homemade foil drip pan It is a good idea to hold water in your smoker.
I put water in the main grease tray, which I don’t use to collect grease. On the bottom rack, I put in a large disposable pan or make a tin foil pan to catch the drippings. The closer to the edges you place the tin foil pan the less mess you will have.
Keep a check on the water content as it may need refilling after a few hours. A splash of water in each tray can help with clean up as it can keep juices from baking on to trays.
To preheat the smoker, press the up or down buttons to set the temperature. If your smoker has a knob, turn the knob until it points to your desired temperature.
It is recommended to preheat the smoker to about 200 to 225 degrees Fahrenheit. Leave the smoker to preheat for up to 45 minutes. Most smokers display temperature in Fahrenheit. Be sure to check which unit your smoker uses for temperatures.
Preheating your smoker is a must, and this smoker needs more time than a propane smoker.

Step 8: Put the Meat In And Start Smoking
Once you reach the desired temperature, it’s time to add your meat!
Your cooking racks should be greased or foiled beforehand to make cleanup easier.
Once the temperature is correct you are ready to put the meat in.
I recommend using your own temperature probe. Many electric smokers come with a built-in thermostat, but this can be one of the lowest-quality components of the whole device. While a top brand may have a better thermometer than your standard gas grill, the top BBQ chefs still invest in a digital meat thermometer.
I have found the Inkbird Wireless Bluetooth BBQ Thermometer to work very well.
Quickly open the door and add the meat to the racks, keep the door open for as little time as possible. Add more wood chips if needed.
PRO TIP:
When you add more chips into the chip pan do not adjust the controls.
Adding chips in will cause an increase in temperature, which will even out quickly.
After the meat reaches the ideal internal temperature you are ready to take it out.
Some meats benefit from being let to rest for 20 minutes or so after the cook.
PRO TIP:
One of the best electric smoker tips to apply is to leave vents fully open as you smoke meats to avoid the risk of creosote build-up on your meat. Creosote is a compound found in smoke that gives smoked foods that desirable BBQ flavor, but in large amounts can make the food taste bitter. The only times you should close your vents is when you have finished smoking your meat.
Step 9: HOW TO CLEAN A DIGITAL ELECTRIC SMOKER
Keep your smoker clean. Part of the appeal of electric smokers is that they burn cleanly.
After each cooking session, take some time to clean your cooking surfaces, from cast iron pans to cooking grates. Using a drip pan during your cooking session will help keep your smoker clean. Just be sure to clean this drip tray whenever you clean the rest of the unit.
The buildup of burned grease and food in your electric smoker will reduce the smoker’s cooking performance. Keep it clean with just a few easy steps and this will ensure it remains in top working condition.
Remember to use only non-abrasive cleaners; mild dish detergent works great.
CLEAN THE SMOKER’S COOKING CHAMBER
Let the smoker cool, then clean the interior chamber. Remove the racks, water pan, drip tray and smoker box. Brush any particle buildup toward the bottom of the smoker.
Sweep the residue out of the chamber.
PRO TIP: The inside of the cooking chamber will darken with use and will not return to a shiny silver color with scrubbing. This darkening stops rusting and actually improves the performance of the infrared cooking system.
Using warm, soapy water, gently scrub the inside of the smoker with a sponge or a plastic bristle brush. Do not use metal. Wipe it dry.
If using a bristle brush, make sure no loose bristles remain on any of the cooking surfaces next use.
Wash the cooking racks, water pan, and drip tray with warm soapy water, rinse and dry.
For stick-free cooking and easy cleaning, apply a coat of vegetable oil or vegetable oil-based spray to the cooking racks before each use.
CLEAN THE OUTSIDE OF THE SMOKER
Clean the outside control panel and the top of the smoker by wiping with a damp cloth using warm soapy water. Wipe dry.
If your smoker is equipped with a window, use cleaners approved for use on ceramic glass cooktops, and clean both the interior and exterior.
Make sure to wipe the door seal with a damp cloth to get rid of the smoke residue that builds up after each use.
CLEAN THE THERMOSTATS & TEMPERATURE PROBE
Using a damp cloth with soapy water, clean the surface of the thermostats inside of the smoker and wipe dry.
Clean the meat probe with a damp cloth using soapy water and wipe dry. Do not place under running water, immerse or soak in water.
THE WRAP-UP
The more you use your electric smoker, your BBQ skills will get better. These electric smoker tips are just the beginning, to get you smoking meat and other foods like a pro.
Following these tips when using your electric smoker, will guarantee a difference in the quality and flavor of your BBQ, and mark you out as more than a beginner.
An electric smoker can be the easiest way to smoke meat and fish. We hope this guide helped you learn the basics, as well as some easy tricks to get the most out of your smoking.
RECENT POSTS
PIT BOSS AUSTIN XL REVIEW – BUYERS GUIDE
BEST CHARCOAL SMOKER 2021 – BUYERS GUIDE